


My mom was intimidated by Mexican food, but she loved to eat it. Only problem there was that she never did learn how to eat a taco without splitting the bottom of the shell. And try as I did to show her how to eat a burrito, it would always fall apart and she would then eat it with fork and knife, just as she did with a taco crumbled all over her plate. And try as I did to teach her how to make a simple cheese quesadilla, she would feign helplessness and pout for me to make it for her. If her Mexican gardener would gift her with a rice burrito in a soft tortilla, she was jazzed. But, whenever I offered to make burritos for dinner, she would protest," I don't like RAW tortillas. I want it fried ". No "please", no "thank you". No way, no how. JUST DO IT! Despite that I told her, many times, that an un-fried flour tortilla wasn't "raw", she would call me a liar and accuse me of trying to feed her "crap". But, see, what that was really about was that she couldn't hold a burrito right to save her soul, but she could eat a fried burrito with a fork and not feel foolish. For her, eating tacos and burritos with a fork was written in stone.


My late best girlfriend of 21 years wouldn't eat onions, bell peppers, or spicy food. Because when she was a kid, her mother would frequently make a slosh of hamburger meat with bell peppers and onions and force her to eat it. By "force", I mean that her mother would push her face into the food on the plate. And if Kathy still wouldn't eat it, her mom would grab her by the hair, drag her down the hall and beat her silly with a hairbrush. Great way to get a kid to eat something she has learned to hate.
I do have to brag that I got Kathy to taste my spaghetti sauce, onions and all, and she was totally surprised to find that she liked it. A new toy! I was highly amused by her food choices. Once a week, we would go out for Mexican food, and she would always pick the gringa food at Poncho Villa's, and she would always order only a cheese quesadilla because it was 'safe'. I would rather have gone to Tiny's, where the salsa was so greatly hot that it would burn the tongue if you weren't used to truly hot food. But that was 30 years ago and Tiny passed away. And I'm no longer into luncheon masochism...My stars, how I do miss that woman.
Mr. P is the barbeque meister at our house. Come to think of it, every man who grills thinks he is the greatest at it. It has been my experience that their chicken is underdone and their meat is way overdone and dry. It pisses me off to have to eat the stuff. But, I can truthfully say that Mr. P does perfect steaks and ribs, and snapper wrapped in bacon, and the burning of chiles so that I can easily peel the skins off for burgers, rellenos, and steaks.

I have tried different ways to burn the chiles for peeling off the skins. Dry pan on the stovetop, and the oven broiler, and the toaster oven broiler. But it really is best when they are done on the grate over the coals. The skins peel off without tearing the peppers, and the chore takes mere minutes as opposed to an hour using the other methods. And...and..oh, those peppers smell so much better than the dull results that 'the kitchen way' brings.
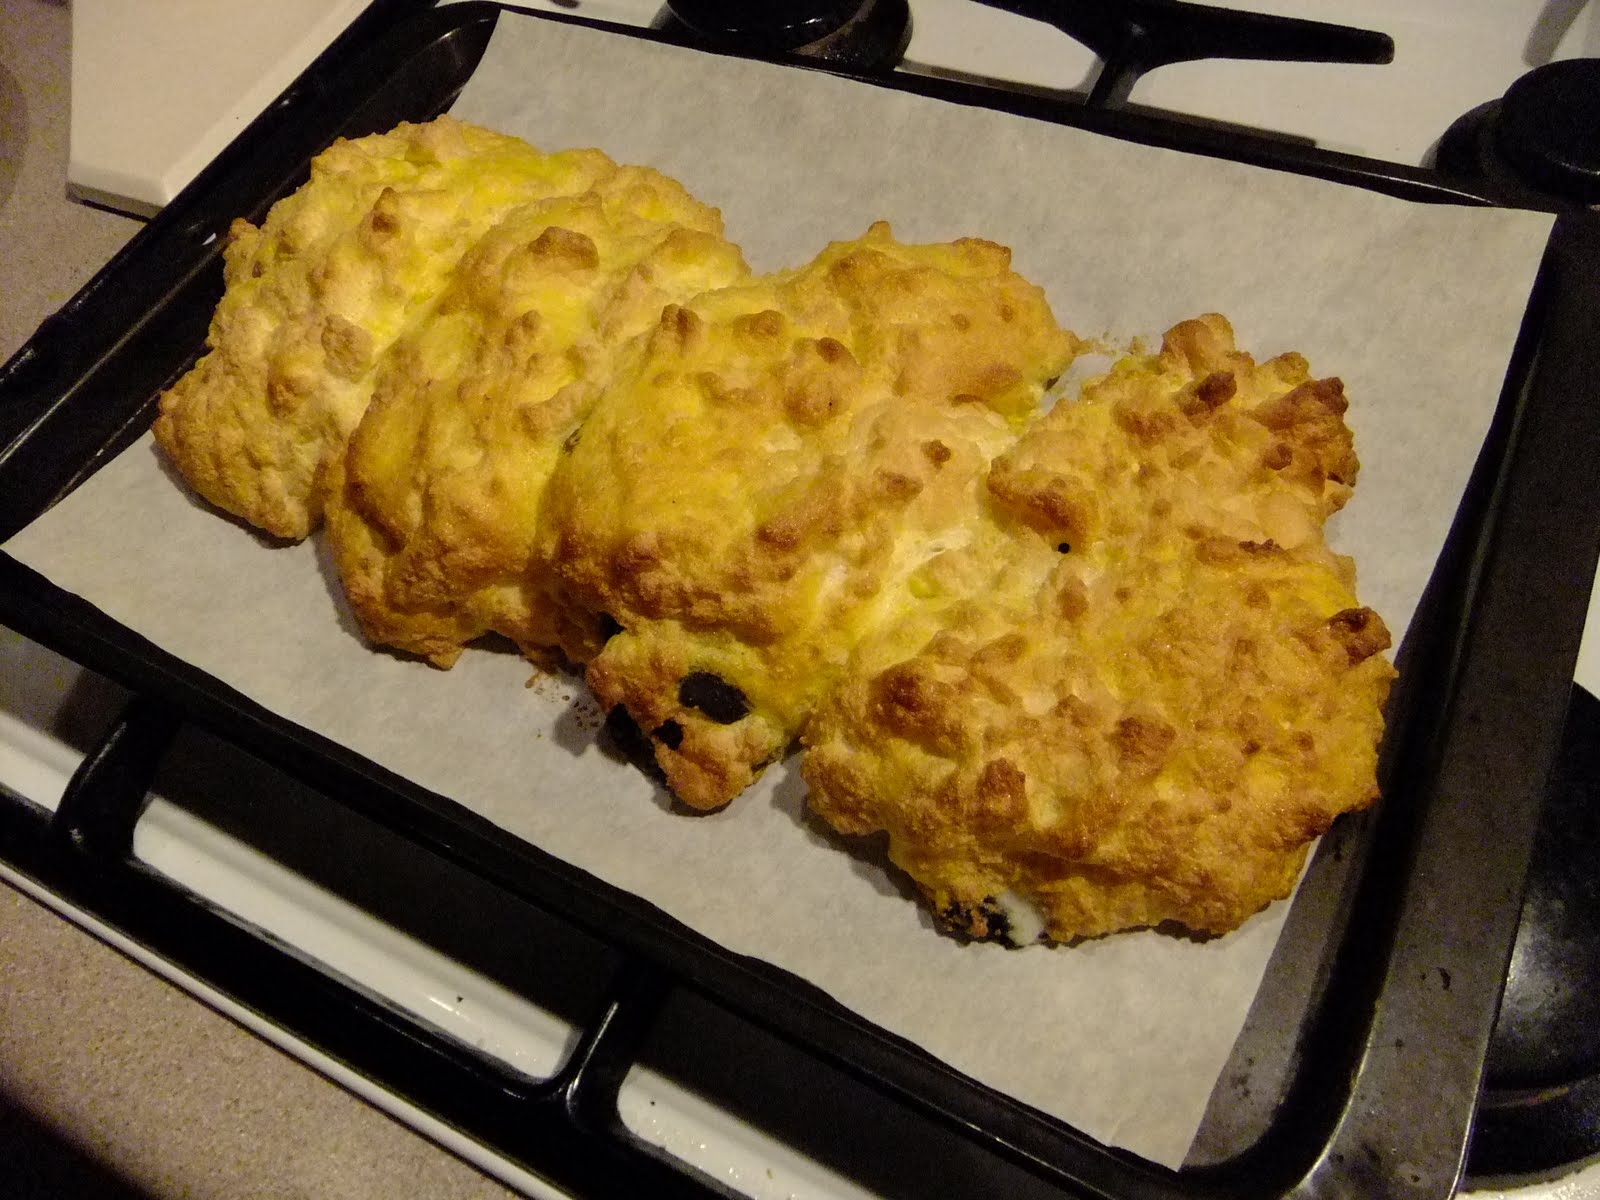
Here, you will see the rellenos cooked two ways; baked and fried. Pasillas baked, Anaheim fried, same batter recipe, and two ways to burn the skins for peeling. Believe me, it matters how they are burned, especially if you are going to fry them in deep grease. It really sucks when the cheese slice falls through the bottom and into the hot grease because the chili is torn and won't hold the cheese. You can wrap a torn, stuffed chili with a strand of the pepper, but that's no guarantee the cheese won't fall out. Should you choose to fry yours (my favorite), use caution. I have been badly burned a dozen times. Some of us are so focused on retrieving the fallen cheese that we forget not to put our fingers into the oil. Oh yeah, I did that.


When choosing the chilis at the store, try to get them as ripe as possible without wrinkly skins. Pasillas are fatter and thicker than Anaheims. They are a blackish dark green. Anaheims can really mess with your mind when all you have to choose from are curly. aHA! Another reason to do them on the BBQ where the heat gets evenly distributed. Pick the biggest, flattest ones you can find. Pasillas grow quite a bit bigger, not hard to find. Their flavor is much different from the Anaheims, and their aroma is less desirable, but the Mexicans love them all just the same. And I learned from Mexicans in southern California. No vatos. No essay. Few things are as endearing to me as two of the ancient ones in a bar, slow and stupid with the tequila and a stashed flask of El Presidente, swapping recipes and kissing their fingertips to express their delight with the food. By the gleam in their eyes, you would think they were telling tall tales of short whores.
CHILI RELLENOS - baked
4 Pasilla Chiles, skins off
4 eggs, seperated
1/4 tsp. salt
1 Tbsp. sugar
2 Tbsp. all-purpose flour
4 slices of Jack or Cacique cheese, cut 1/4" thick and 1" wide, slightly shorter than the chilis
1. With these, I used the toaster oven on high, 450F. Do not use foil in a toaster oven! Just place on the small rack in the roasting pan and place in the middle of the oven.
2. Toast until color starts to darken and turn over a few times during roasting with tongs, and burn the chilis all the way around, sides included.

Get them as black as possible. They will puff and bubble, hiss and pop, and fill your kitchen with wonderful aroma. This will take about 20 to 30 minutes. Remove from toaster oven and let cool to room temperature. Place them in the fridge, uncovered, to chill for a few hours, or cover loosely with foil and keep in fridge overnite.
3. When ready to use them, take chiles out of fridge and peel the skins off with your fingers.Roll peppers back and forth between your thumb and forefinger tip to loosen them up and partially part them from the skin. You can peel big portions at a time, or you might have to peel in little bits. Be careful not to rip the peppers open. If this happens, don't lose heart.These will be baked on a parchment-lined baking sheet and you can take a strand of the pepper and wrap it around the the intact part of the chili when it's stuffed with the cheese.
4. Meanwhile, remove eggs from the refrigerator and let stand at room temperature for 30 min.
5. Without lifting them, slice the tops off the peppers and gently remove the seeds, as much as is possible but you need not be anal about it. The peppers are slippery, and so I place my finger about 1/2" from the top and gently push down and slide up to the top to squeeze the seeds out. Gently slide in the cheese slice, one per pepper. Set aside.

6. Preheat oven to 450F with rack in center of oven. Line a baking sheet with parchment paper or silpat.
7. Seperate eggs, being careful not to get yolk in the whites. Check for stray shell bits and remove them. They will cling to a shell and come out of the goo much easier than trying to chase them with a finger or a spoon. Pour the egg whites into the bowl of a stand mixer fitted with the whisk attachment. Starting on low speed, beat the egg whites for 30-45 seconds. Add salt and turn speed up to medium high for 2 minutes. Turn speed to high. When the whites gain volume and get to really white, gradually sprinkle in the 1 Tbsp. sugar, and beat until glossy and stiff, about 4 to 5 minutes.
8. While the mixer is beating the whites, add 1 1/2 to 2 Tbsp. flour to the yolks in a bowl and mix well with a fork. Mixture will be a little lumpy.


9. When whites are whipped and ready (stiff), remove bowl. Remove whisk and conk on bowl to dislodge egg whites into bowl. Gently pour in egg yolks/flour mixture and gently fold into egg whites being careful not to collapse the whites.


10. Place a stuffed pepper into the batter and coat generously. Remove with slotted spoon and place on lined baking sheet. Do this with each stuffed pepper and place a couple of inches apart if your baking sheet is big enough. If not, don't worry, just place 1" apart instead.

11. Bake for 7 minutes, until puffy and golden. Baked rellenos are dry compared to the fried ones. You really want to serve them in a chosen sauce. My quick sauce is in the recipe below.

CHILE RELLENOS - fried
5 Anaheim chiles, skins off
5 eggs, seperated
1/2 tsp. salt
1 Tbsp. + 1 1/2 tsp. sugar
3 Tbsp. flour
Vegetable oil or lard for frying (do NOT use olive or other low-heat oil)
5 slices Jack or Cacique cheese, 1/4" thick, 1' Wide, sorter than chiles
1. Bring barbeque to low coal. With tongs, place chiles on grill. Turn every 5 minutes to blacken evenly all the way around. They will puff up and blister and pop a bit. This should take about 30 minutes. When done, with tongs place peppers on plate and let cool to room temperature.Cover loosely and refrigerate overnight.
2. Remove chiles from fridge and follow directions in recipe above for prep.
Prepare the sauce, or you can use store-bought Pace Picante or green chile sauce, whatever you like.
For quick, homemade sauce:
1 14.5-oz. can tomato sauce
1 tsp. cumin, or more to taste
1 1/2 tsp. chili powder, more or less to taste
1 tsp. garlic powder
1/2 tsp. garlic salt
2 good pinches of salt
2 tsp. white vinegar
3/4 tsp. vegetable oil
1/4 cup minced yellow onion
1. In a small bowl, mix all the ingredients together. Pour into clean frying pan and simmer for about 5 minutes. Turn off heat and let sit.
2. Put vegetable oil or lard into large frying pan to about 1"- 1 1/2" deep. Heat on medium high to 375F. To test for readiness, immerse tip of wooden spoon into oil. If the oil immediately fizz-bubbles against the wood, it is ready for frying the rellenos.
3. Gently place two rellenos, or three, into the oil. When egg underneath is golden and cooked, use two slotted spoons, or one spatula and a slotted spoon to turn them over. This is where it gets just a little tricky, as they will resist being turned over.So, ease up the heaviest side to turn it. If the cheese and/or the cheese and pepper fall out to the bottom, scoop underneath it to lift up off the bottom of the pan and hold it there until done, about 40 seconds.

When done, place rellenos on plate and do the last two or three, and then place on plate and set aside.
5. In seperate large frying pan, have your sauce heated up and place all the rellenos into the sauce. Reheat for a minute (they will puff up again). Plate with the sauce poured over them. Enjoy as they are, or serve with Spanish rice and refried beans. I prefer Zatarain's Spanish Rice mix because it's got a great tang.


They look delicious-but what traumatising memories that some people have. That sounds absolutely awful getting your face pushed into a plate of food.
ReplyDeleteIn that generation of moms, there was the tendency to beat their kids and to punish them with threats over food. Mine wasn't nice, either. Our dads tended to be the ones who uplifted our spirits. In current times, people have come into the understanding that their children will develop obesity or else bulemic problems as a result of being forced or guilt-tripped into eating every last bite on their plate. Children are too young to comprehend the deliberate wasting of food, or the starving children in Africa having anything to do with those last two bites on their plate. And in some religious circles, the enjoying of food is a sin. Go figure. At least I didn't have to deal with the latter. :0)
ReplyDelete